Adding & Grading a Grade Item in Moodle
Adding a Grade Item
Adding a Grade Item in your gradebook provides you a place to grade any offline activities, such as a presentation given in class, participation points, or other homework and quizzes handed in as a physical copy.
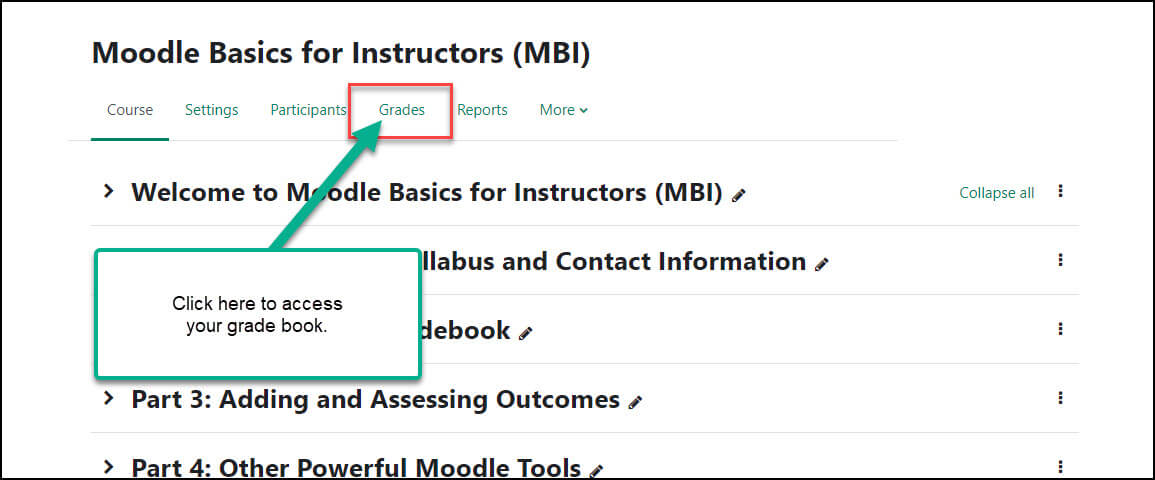
Step 1: From within your course in Moodle, select Grades from the Menu at the top of the course:

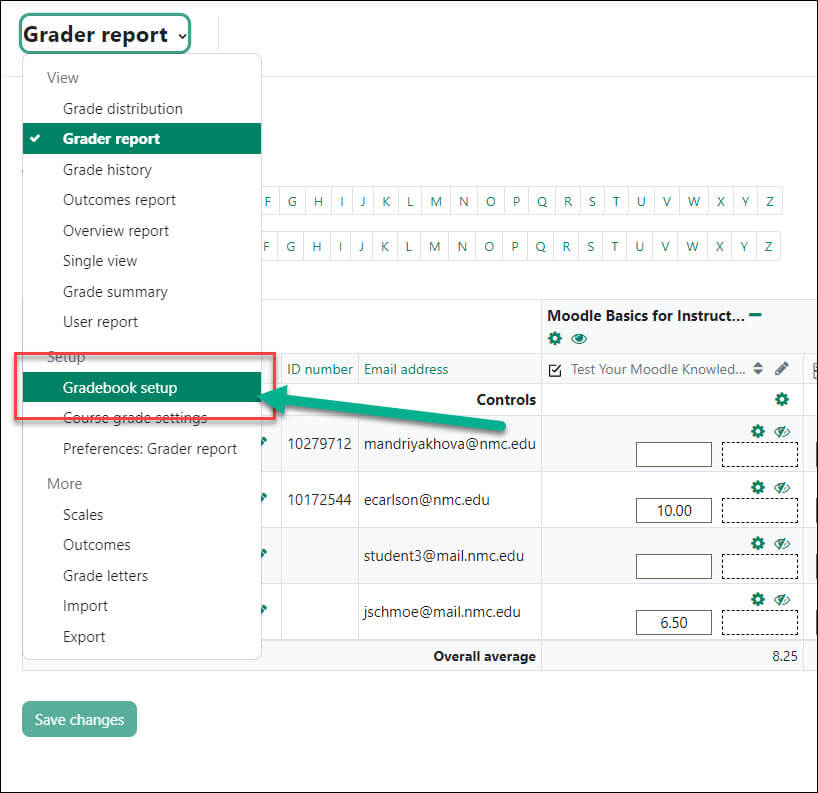
Step 2: Click the dropdown menu from the top left and select Gradebook setup:

Step 3: From the top of the page, click the Add grade item:

Step 4: Fill in the Item name and your desired Maximum grade (Maximum grade indicates how many points you want the assignment to be worth).
Step 5: If you have categories set up in your course, you will see a Parent category setting. Use the Grade category drop down menu to tell Moodle what category your added grade item should be placed under:

Step 6: Click the Save changes button at the bottom.
Adding a Grade to the Gradebook
Step 1: From within your course in Moodle, select Grades from the Menu at the top of the course.
Step 2: Click in the box corresponding to the student and item you would like to enter a grade for. After you click, you may notice one or two boxes activated, this depends on whether you have feedback turned on:

Step 3: Type the grade/points into the first box, and any feedback into the second box. The grade will be automatically recorded for the student. You do not need to click “save.”
For Moodle help, contact the NMC Technology Helpdesk at 231-995-3020

